Mapping Samba shares in Windows (and how to assign drives through a Group Policy)
(Looking for how to set up a Samba share in Linux? See one of my previous posts for setting up Samba shares with Ubuntu)
Before I start, this article assumes that you already have a Samba share you want to access and that you are running Windows (XP, 7, 8 its all kind of similar). It’s quite a straightforward guide and I’ll go into how you can apply a Group Policy to map a drive automatically at login.
Map the share – GUI
- First of all, you should be able to connect directly to the share by navigating to \\x.x.x.x\share-name\, although you might not be authenticated to view it if there are permissions applied to it.
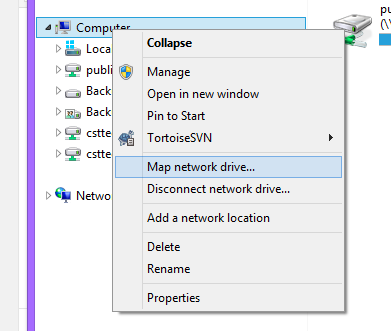
- To map the drive in your list of drives in Windows, right click My Computer and select Map network drive
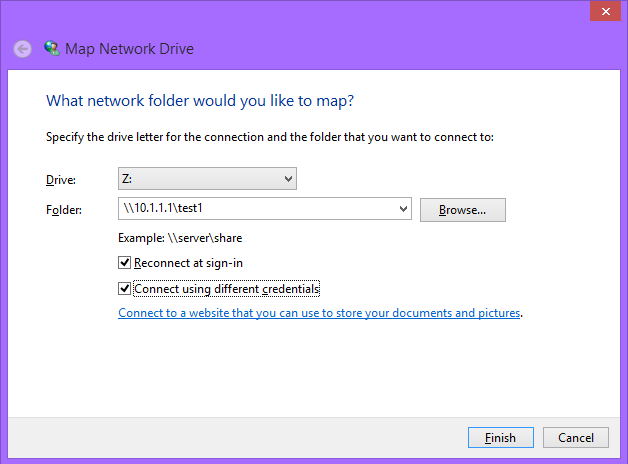
- Next, give it a drive letter and put the share’s address in. Note that this is whatever you named the share heading in /etc/samba/smb.conf and not necessarily its absolute path on the server.
- If you want the drive to be persistent, IE appear when you next log in, keep “Reconnect at sign-in” checked.
- If the drive requires authentication from specific users, click “Connect using different credentials”. If this is on a different domain, make sure the username is in the format of domain\username and that you check the box to remember your details, otherwise you’ll have to keep typing in your password every time you want it to connect.
- Your drive should now be mounted and reconnect when you logon!
Map the share – command line
- You can use net use to map a share in the same way by typing:
- net use z: \\10.1.1.1\test1
- For shares requiring authentication as a different account other than the one currently logged in, you can connect using specific credentials as above, for user Troliver (and, if you want, on a domain called myDomain) with:
- net use z: \\10.1.1.1\test1 /user troliver password1
- net use z: \\10.1.1.1\test1 /user myDomain\troliver password1
- You can then keep the drives in your list every time you log in with the /p[ersistent] switch:
- net use z: \\10.1.1.1\test1 /p:yes
- net use z: \\10.1.1.1\test1 /persistent:yes
- Now, if you want to the share to be persistent and use the same credentials (and store them), you have to use a different syntax, which will then ask you to input your details;
- net use z: \\10.1.1.1\test1 /persistent:yes /savecred
- And if you want to delete a share, or all shares, you can use the following:
- net use * /delete
- net use z: /delete
Map the share – Group policy
Going on from the command line mapping, you can also map drives this way through using Active Directory Group Policies. For this, you need to have permission to create Group Policies on your domain controller.
- Firstly, open up Group Policy Management
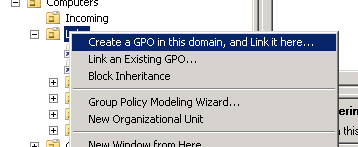
- Next, right click on the OU with the computers in that you want to apply to Group Policy to and select the option to make a new GP and to link it here.
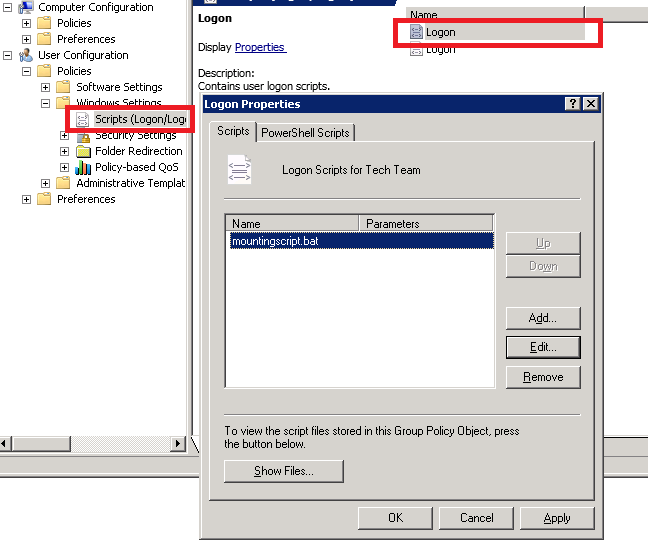
- Edit the policy to the level of User Configuration > Policies > Windows Settings > Scripts (Logon/Logoff).
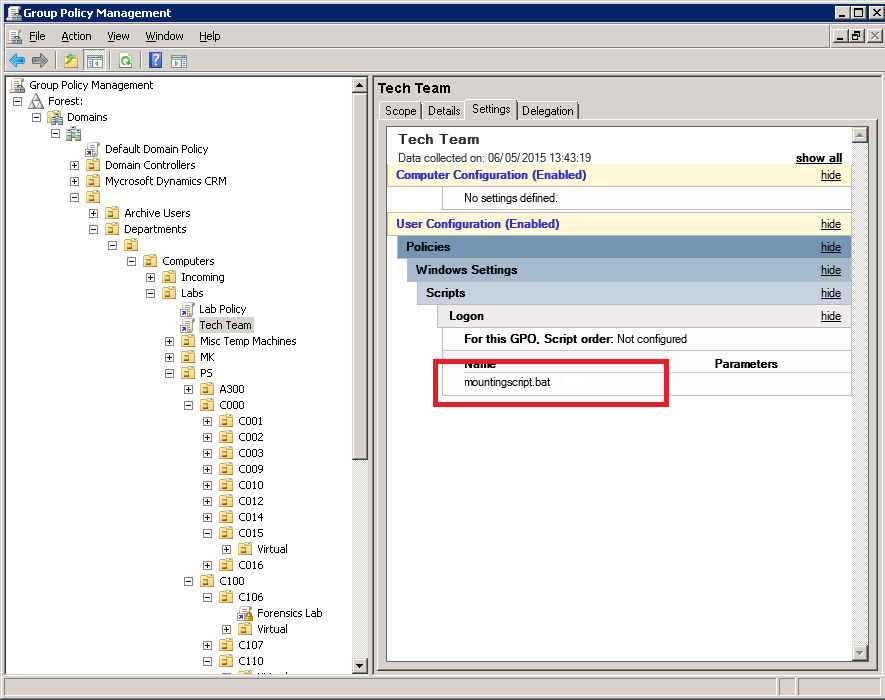
- We can add scripts here that we want to execute at user logon. Right click “Logon”, select properties, click “Add” and create a new file named mountingscript.bat file in the folder for your GP.
- You can get this script here to do anything you want, but this one will just be used for mapping shared drives:
net use x: /d
net use x: \\storageserver.troliver.com\documents /persistent:no
net use w: /d
net use w: \\storageserver.troliver.com\resources /persistent:no
net use p: /d
net use p: \\storageserver.troliver.com\shared /persistent:no
- This will map three shares to three different drive letters. persistent:no is also added so that the drive isn’t saved between logons. This is optional, but a good idea to include because the drives might end up being changed remotely, later. Additionally, you might want to delete the drives in case somebody else has mapped them already, with net use [drive] /d(elete) before each drive.
- The changes should be saved immediately when you click apply, although they make take some time to propagate through to the different domain controllers. You can verify the settings in the Settings tab.
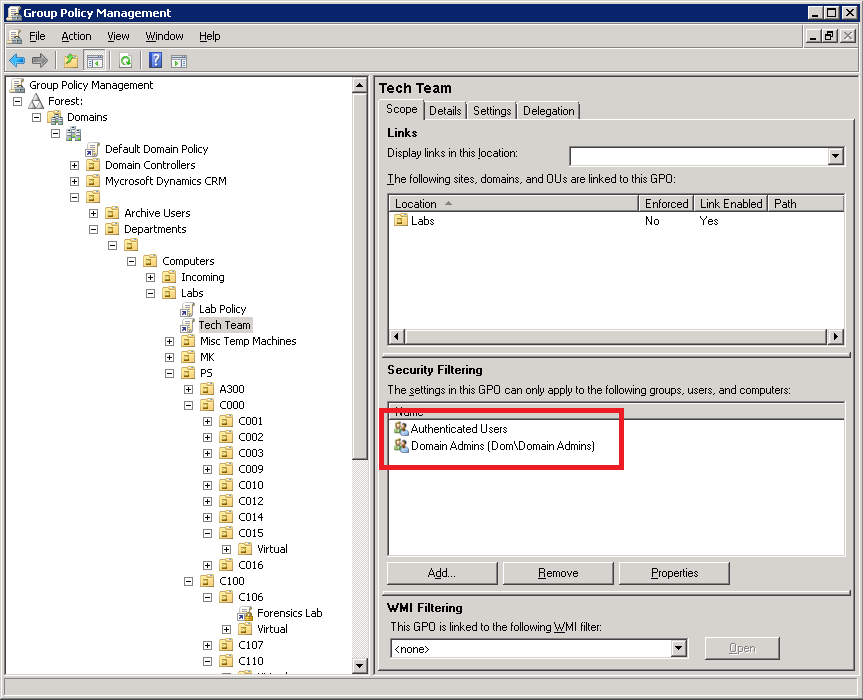
- One final thing you can do is to restrict which groups this policy applies to. Up until now, there hasn’t really been a reason to use the default Lab Policy that already exists for the same OUs. But we can target specific users – such as a technical team – by making a new policy which has its Security Filtering only apply the GP to specific users and groups. For this, you will want to remove “Authenticated Users” and replace it with a group (or groups) of your choice. Its important to remove “Authenticated Users”, otherwise you’ll not have restricted it at all!
- If you’ve configured it correctly, you should now get a drive (or drives) show up at logon for any domain user who’s logged onto the OU that the Group Policy applies to.
I hope this manages to help people to mount their Samba shares seamlessly with the rest of their Windows Network. There’s very little to really talk about with the Linux side as, once it is set up, it should appear to the user no different from a Windows Server share.
If you have any questions or comments, please do get in touch or leave a comment below and I’ll try to help!
‹ Trouble in Sambadise; How to remove .DS_Store and other system-created files in Samba FOG – Installing and Troubleshooting FOG 1.2.0 on Ubuntu 14.04 ›
Can a samba share be mounted in Windows to be available to SYSTEM user and be persistent trough reboots?
Thanks,
Cosmin
Hmmmm
Can’t really try this out right now but if this helps, can you let me know?
https://serverfault.com/questions/426288/permanently-mount-network-share-without-the-need-for-log-on-windows
This will not work:
net use z: \\10.1.1.1\test1 /user troliver password1
Its:
net use z: \\10.1.1.1\test1 /user:troliver password1
It has been forever since I actually used this, so this may well be correct. I will have to get around to updating this sometime!